

Click on image to look in real size
By Sofía©
I created this tutorial in PSP X.
I created this tutorial in PSP X.
Elements Used:
Tubes, two selections, Sources: Secret Recipe
I want to be grateful to Crystal and to Patry for allow me to use her beautiful tubes in this tutorial.
Filters:
Xero - Tekstya – Tekstya,
Adjusts – Variations,
Simple - Top Left Mirror,
FM Tools, Blend Emboss
and Bordermanía (you can find them in each name)
Remember keep your program closed while you download the filters.
Put the filters in the Complements' folder in your program PSP.
Put the selections in the Selections folder in your program PSP
Open the tubes, duplicate it with Shift + D, then close the original,
in the copy eliminate the mark of the tuber and the background if it has. Minimize it.
Let's go
1. Open a new image, transparent background of 450 x 350 pixels. In your palette of materials, Foreground: #b36dbd (purple). Fill the layer of your background with this color
2. Layers, New Raster Layer.
Prepare a gradient Foreground: #b36dbd and Background: #f0bde6,
Style: linear, angle: 45, repeat: 1, Invert: CHECK. Fill your layer with this gradient.
3. Effects, Distortion Effects: Pixelate, block width and block height: 70, Symmetric: CHECK IN. Adjusts, Sharpness / Sharpen.
Effects, Xero - Tekstya with this settings:

4. Effects, Filter Simple / Top Left Mirror (it is predetermined)
5. Effects, Filter FM Tools / Blend Emboss (it is predetermined)
6. Effects, Edge Effects: Enhance
7. Open the copy of the tube PatryMists_06_Flowers_53. Image, mirror.
Image, Resize: 73 %, arrange at left side, look in the final result.
Edit, Copy and Paste in your work area as new layer and name this layer "Flower 1".
Duplicate layer, and name it "Flower 2"
8. In layer "Flower 1" change Blend Mode of the layer: Screen
9. In layer "Flower 2" decrease the opacity 84 %, keep Blend Mode of layer: Normal.
10. Layer, New Raster Layer. Selections, Load, Load Selection from the disc;
to look for the selection that I prepared: sel001TUT_LilasParfum_Sofía© and accept.
Fill the selection with the Floodfill Tool with the first gradient, once.
Selection / Selection none.
Effects, 3D Effects, Drop Shadow: 0/1 / 75 / 0 color: #a34f9f. Adjusts, Sharpness, Sharpen
11. Layer, New Raster Layer. Selections, Load, Load Selection from the disc;
to look for the second selection that I prepared: sel002T_LilasParfum_Sofía© and accept.
Fill the selection with the Floodfill Tool once. Selection / Selection none.
Effects, 3 D Effects, Drop Shadow: 0 /-1 / 75 / 0 color: #a34f9f. Adjusts, Sharpness, Sharpen
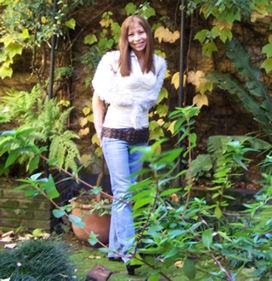
12. Open the copy of the tube ©rystaltubed_Joanna1.
Edit, Copy and Paste in your work area as new layer.
Image, Resize 56 %, and arrange at right side like in the final result.
13. For avoid that the image girl do not seem cut, open your Selection Tool configured in rectangle with feather: 10 and draw a rectangle at her right (in her back), then give Delete in the keyboard.
14. Layers, Arrange, Move down (twice, until the girl stays underneath the selections.)
15. Open the copy of the tube PatryTubes_06_ValentineD_07,
with the Selection Tool, in Freehand: point for point, select the small bottle of perfume.
Copy and Paste as new layer, name it "Frasquito" (it mean: small bottle). Arrange the tube at left side at same hight where start the above selection, look in the final result.
16. Effects, Adjust / Variations: click twice in magenta, 3 in blue and 8 (yes! eight) times in light, then, accept. Adjust, Sharpness: Sharpen.
Adjust, Brightness and Contrast / Clarify: strength of effect: 3.
17. Duplicate the layer, name this copy: "Frasquito 2", change Blend Mode: Luminance (Legacy).
18. Layer "Frasquito 1", decrease opacity of the layer: 30, keep Blend Mode: Normal.
19. Apply drop shadow only in the layer "Frasquito 2".
Effects, Effects 3D, Drop Shadow:-3 /-3 / 65 / 5 color: #7f317c
20. Open the tube PatryTubes_06_Elements_11, with the Selection Tool,
configured in Freehand: point to point, select a small bow purple.
Copy and Paste as new layer. Arrange at same hight of above selection and the small bottle
Adjust, Sharpness, Sharpen.
21. Layers, New Raster Layer. In your palette of materials:
Foreground: #f0bde6 and Background: your gradient.
22. Tools, Rectangle, Rectangle and we will prepare the ribbon
that hold the small bottle, look in the capture.

23. With the Selection Tool selection configured in circle
make one inside the ring that hold the small bottle, look in the capture.

24. Give Delete in your keyboard. Selections, None Selection
Try to be neat as possible because it is a final detail.
25. Effects, 3 DEffects, Drop Shadow:-3 /-3 / 65 / 5 color: #7f317c.
Decrease opacity of the layer: 60 %.
Layers, Arrange, Move until i underneath of the small bow,
now is the right moment to arrange it, if before it wasn't in the center. Merge all layers.
26. Image, Add borders: 1 pix, Symmetrical, color: white
27. Image, Add borders: 3 pix, Symmetrical, color: #f0bde6
28. Apply, Effects / Bordemanía / Frame 2, with this settings:

29. Palette of materials, Foreground: #f0bde6 - Background: White.
30. Layers, New Raster Layer
31. Text Tool , look for the Secret Recipe font, size 55, width of line: 1. Write your name.
Effects, 3 D Effects, Drop Shadow:-3 /-3 / 65 / 5 color: #7f317c
32. Add your watermark if it is your custom.
34. Save as Optimized JPG.
We finish!, I hope you enjoyed it.
30. Layers, New Raster Layer
31. Text Tool , look for the Secret Recipe font, size 55, width of line: 1. Write your name.
Effects, 3 D Effects, Drop Shadow:-3 /-3 / 65 / 5 color: #7f317c
32. Add your watermark if it is your custom.
34. Save as Optimized JPG.
We finish!, I hope you enjoyed it.
Sofía©
©Copyright Tutorial " Tag Lila's Parfum " By Sofía©Written especially for PSPFULLADDICTION©
05-11-2006
Buenos Aires - Argentina
Translated by Sofía©
02-03-2008


No comments:
Post a Comment