By Sofía©
I created this tutorial in PSP X.
Elements used:
4 images and font
I created this tutorial in PSP X.
Elements used:
4 images and font
Link Image of the Flowers: Getty Images, here
Filters:
VM - Instant Art: Lightlines
VM - Instant Art: Vernisage
Let's go
Open a new image of 500 x 400 pixels, Transparent.
Palette of materials, pick the following colors:
Foreground (first plane) and Background: #f0d8c2
Fill our layer base with this color
Open the image of flowers,
Layers / Promote Background Layers
With the Selection Tool in Freehand: Feather 35 / Smoothing: 5
Make an outline around the flowers (look at the example)
Selection / Invert.
Image / Resize to 65 % Resize all Layers: Check In
Copy and Paste as a new layer in your work area and place it on the right side
Decrease Layer Opacity: 40 %
Duplicate layers, name this layer "Flowers 2",
Image / Mirror and put this on the left side
Keep Blend Mode in Normal and Opacity at 100 %
Merge down
Duplicate your layer again, name it "Fusion" and in this layer apply:
VM Instant Art / Vernisage with the following settings:
Change Blend Mode in your Layer's Palette to Screen – Decrease the Opacity: 34%
Layers, New Raster Layer
Efectos / VM Instant Art / Light lines with the next settings:
Layers, New Raster Layer
Efectos / VM Instant Art / Light lines with the next settings:
Change Layer Blend Mode to Screen – Decrease the Opacity: 50%
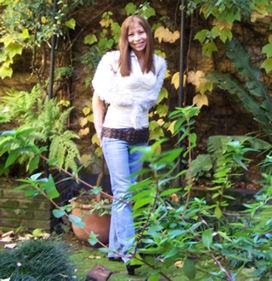
Open the photo where Mandy is sitting, Mandy_1
Layers / Promote Background Layer
Selection Tool apply the next settings:
Freehand / Feather: 35 / Smoothing: 5
Make an outline around the model (like shown in the capture)
Open the photo where Mandy is sitting, Mandy_1
Layers / Promote Background Layer
Selection Tool apply the next settings:
Freehand / Feather: 35 / Smoothing: 5
Make an outline around the model (like shown in the capture)
Copy and Paste as a new layer in your work area, name this layer: Mandy 1
Decrease the Opacity: 65 %
Image / Resize to 65 % and put below to the left side as shown in the final result.
Decrease the Opacity: 65 %
Image / Resize to 65 % and put below to the left side as shown in the final result.
Eraser Tool: Round Size: 40 Hardness: 38 Step: 25 Density: 100 Thickness: 100 Rotation: 0 Opacity: 50 for the dark details and to making it more delicate lower the Opacity to 12 (check it in the example above finished on the leg)
We do the same for photos 2 and 3 of Mandy and paste them as new layers to each one
Opacity of the layer: 65 %
Mandy 3 Layer (Layer with the image in the right side)
Image / Mirror and put it at the right side.
Lower the opacity of this layer: 60 %
We arrange it according to the final result or you arrange according to your preference. 😊
When we are glad with the arrangement of the all photos we are going to retouch only in the faces of the model:
Image / Mirror and put it at the right side.
Lower the opacity of this layer: 60 %
We arrange it according to the final result or you arrange according to your preference. 😊
When we are glad with the arrangement of the all photos we are going to retouch only in the faces of the model:
Eraser Tool: shape: Round Size 82
Hardness: 100 Step: 25 Density: 100 Thickness: 100 Rotation: Opacity 17
In the layer “lightlines” we will erase only face and hair's model
Merge / Merge all (Flatten)
Layers, New Raster Layer
Palette of materials Foreground (first plane): white – Background: closed
Tools/ Rectangle / Rectangle (See at the final result above all)
Draw a rectangle with width of line: 2
Layers / Convert to Raster Layer
Blend Mode: Overlay
Layers, New Raster Layer
Palette of materials: Foreground (first plane): white
Tool text Size 50 / width of line 1/ Bold / Seek for the font MyDearWatson
Effects, Effects 3 D Drop Shadow: 1/1 / 50 / 3 black
You write Mandy Moore or your name
Image / Add borders / Symmetrical borders: 1 color: #f0d8c2
Add your watermark if you like it.
Save as Optimized JPG.
We're done, I hope you enjoyed it.
Sofía©
©Copyright Tutorial " Sweetie Blend Mandy Moore " By Sofía©
Written especially for PSPFULLADDICTION© in 04-04-2006
in Buenos Aires – Argentina
Translated by Sofía©
in 02-02-2008
Somewhere in the other side of the world.


No comments:
Post a Comment