
Tag Cherish
By Sofía©
I created this tutorial in PSP X.

Click on image for to see real size.
Elements Used:
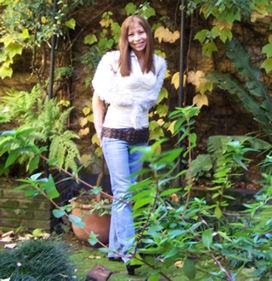
Tubes, mask 20-20, Font: Palms International
I want to be grateful to Patry for afford me to use her beautiful tubes in this tutorial.
Tubes, mask 20-20, Font: Palms International
I want to be grateful to Patry for afford me to use her beautiful tubes in this tutorial.
Filters:
Filtres Unlimited 2.0
Xero – Tekstya, (in Xero 3)
Put the masks in your folder Masks of the Program PSP
Open the tubes, Duplicate with capital letter + D, to close the original, in the copy to eliminate the mark of the tuber and the background if it has. Minimize.
Let's go
1. Open a new transparent image of 550 x 400 pixels.
2. In your palette of materials: Foreground (first plane) #d1c4a1 (beige) and Background: #77663f
3. Fill your layer of back with this color (beige).
4. Layers, New Raster Layer.
5. In your palette of materials invert the order of the colors and fill the layer with #77663f
6. Effects, apply Filters Unlimited 2.0 – Textures Paper - Papyrus: with these settings: Intensity: 66 – Lightness: 96
7. In your palette of layers: Blend Mode: Hard Light
8. Lower the opacity of the layer: 45 %.
9. Layers, New Raster Layer
10. Fill this layer again with #d1c4a1 (beige)
11. Effects, apply the filter Xero – Tekstya with these setting (You has in mind where I did rectangles, to see in the image)

12. Image, Resize: 250 %, only this layer.
13. In your palette of layers, to lower the opacity to 63 %.
14. Layers, New Raster Layer you fill with your beige #d1c4a1 again
15. Effects, apply Filter Unlimited 2.0 – Edges Squares - Edges Square Nº 17.
16. Image, Resize: 85 %.
17. In your palette of layers, to change Blend Mode: Darken
18. In your palette of materials change Foreground: #77663f
19. Layers, New Raster Layer
20. Tools, Brush, settings: like you can in the image, to apply once in the top left angle and again in the low right angle.

21. Lower the opacity of your layer brush to 55 %.
22. Open the copy of the tube Zigzag and Copy and Paste as new layer, put to the left
23. Duplicate the Zigzag, Image - mirror
24. Open the copy of the tube PatryTubes_06_Victorian_05, Copy and to Paste as new layer in your area of work.
25. Put it in the top part, where you can see a third of the tube approximately.
26. With your tool Selection, (the little arrow) to stretch towards the sides up to doing it come on both sides.
27. Change Blend Mode of the layer to: Soft Light.
28. Duplicate the layer, Image – Mirror and Image – Flip, name it this layer “Save_2”
29. Duplicate the layer "Save_2", name it " Save_3" and to close for now.
30. Open the copy of the tube PatryMists_06_Beauty_114, Copy and Paste as new layer.
31. Open your layer " Save_3 ", Layers, Arrange, Move Up and it will stay for on the layer of the girl.
32. Layers, New Raster Layer.
33. In your palette of materials, Foreground (first plane): #77663f – Background: #d1c4a1
34. Prepare a gradient over your color of background: Style: linear – Angle: 140 – Repetitions: 1 – Invert: check. Note: You must has your foreground color: #77663f (your dark color)
35. Tools, Rectangle, to realize a rectangle of 310 x 30 of high place approximately and you begin to do it in the half of your area of work.
36. Tools, Mesh Warp – Mesh Warp and to realize the following sequence:
37. The node named 1, to move down a bit until the curve stays how you can see in the image:

38. The node named 2, to move up in the same proportion as the previous one.

Note: This distortion is very subtle, it is only to give something of movement to our ribbon.
39. Image, free rotation: angle: 145 to the left, to accommodate the ribbon on the right top apex, up to concealing the ends of our bond.
Note: there will appear a little message who says Automatic Actions: Accept.
40. Lower the opacity of your ribbon to 70 %.
41. Effects, Effects 3 D, Drop Shadow: 3 / 3 / 50 / 8 color: #837253
42. Open the copy of the tube Heart and Copy and Paste as new layer, to accommodate on your ribbon.
43. Image, free rotation: angle: 10 to the left.
44. With your tool selection (Freehand), setting: point to point, to select the part of the hoop that hold it, would stay behind, to give Delete in your keyboard, to see in the image:
43. Image, free rotation: angle: 10 to the left.
44. With your tool selection (Freehand), setting: point to point, to select the part of the hoop that hold it, would stay behind, to give Delete in your keyboard, to see in the image:

45. Adjust, Sharpness: Sharpen.
46. Effects, Effects 3 D, Drop Shadow: 3 / 3 / 50 / 8 color: #837253
47. Open the copy of the tube " key " Copy and Paste as new layer, and to accommodate as you can see in the image.
48. Adjust, Sharpness: Sharpen.
49. Effects, Effects 3 D, Drop Shadow: 3 / 3 / 50 / 8 color: #837253
50. In your palette of material: Foreground: #000000 – Background: #c0c0c0
51. Prepare a gradient: Style: linear – Angle: 140 – Repetitions 1 – Invert: check.
52. Layers – New Raster Layer.
53. Tools, Pen: with following settings.
54. In style of line: open it and to go personalize and you put the values that you can see in the image, where says size in each one you put: 3, then save and give it a name to your line of little dots or little balls.

55. You draw a line since the hoop of the heart up to the beginning of your key. Convert your layer of vector into raster layer.
56. Effects, Effects 3 D, Drop Shadow: 3 / 3 / 50 / 8 color: #837253
57. Open the copy of the tube Cherish and Copy and Paste as new layer.
58. Lower the opacity of the layer to 65, to accommodate as you can see in the image end.
59. Merge all (Flatten)
60. Layers, Promote Background Layer to your merger.
61. Layers, New Raster Layer, Fill with white color
62. Layers, Load/Save Mask, Load Mask from disc: to look for your mask 1058: Luminosity of origin, adjust to linen, to conceal all the masks and to invert transparence and to apply: all check.
63. Merge group.
64. In your palette of materials: Foreground: closed – Background: #a29472
65. Layers, New Raster Layer for your text, to choose a font that you like, I used it is Candia Script SSK, size 72, you write your name.
66. Effects, Effects 3D, Drop Shadow: 2/2/80 / 3 color #cfc19
67. Selections, None Selection.
68. Add your watermark if it is your custom.
56. Merge all flatten
57. Save as Optimized JPG.
We ended, I hope you enjoyed it.
Sofía©
©Copyright Tutorial " Tag Cherish " By Sofía©
Written especially for PSPFULLADDICTION©
05-27-2006
Buenos Aires - Argentina
Translate by Sofía©
02-10-2008


No comments:
Post a Comment