Showing posts with label PSP X. Show all posts

6/10/2009

TUT 15 "OH LA LA PARIS"


By Sofía©
I created this tutorial in PSP X.

I want to be grateful to Mariel -Tubes Bellisimo- and Patry -Sin Tubes -
to allow me to use her beautiful tubes in this tutorial,
to her the responsibility to make the tubes and the Image's Copyright belong at their authors.


Materials Used:


Tubes, Font: Bernhard Fashion


Filtros:

FLAMING PEAR, Píxel Trash - FM TOOLS, Blend Emboss,
XERO, Tekstya (I love this filter... do you can see? haha) XERO, Porcelain,
MURA´S MEISTER, Copies, You can download them in each name of filter


Put the filters in the Complements' folder in your program PSP.
Open the tubes, duplicate it with Shift + D, then close the original,
in the copy eliminate the mark of the tuber and the background if it has.
Minimize it.


Let's go


1. Open New Image of 600 x 450 pixels.


In your Materials' Palette: Foreground color: #e5c6ab (beige) and Background: #952418 (bordeaux)
Make a gradient: Style: Radial - Angle: 180 - Repeats: 5 - Invert: CHECK IN -
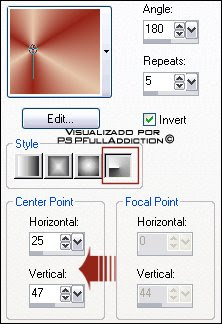

Center Point: Horizontal 25 - Vertical: 47. Look in the capture:


Fill your first layer with this gradient. Name this layer "Base Color".
Effects / FLAMING PEAR, Píxel Trash apply the settings that you look in the next capture:
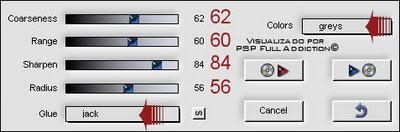


Effects / FM Tile Tools / Blend Emboss apply directly (is pre-setting)
Effects / XERO / Tekstya apply the settings that you look in the capture;
in this case the clear color is: #e5c6ab


Effects / XERO/ Tekstya apply four (4) times the filter with the settings that you look in the capture:
in this case the clear color is: #e5c6ab and the dark color is: #952418
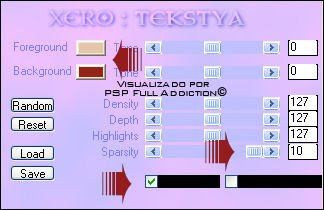


Image / Mirror
Copy and Paste this layer as New Image and minimize it, we will use it more late.

2. Open the copy of the Tube Marif_2006_septembre_face0146.
Image - Resize: Resize at 85%. Copy and Paste as New Layer.
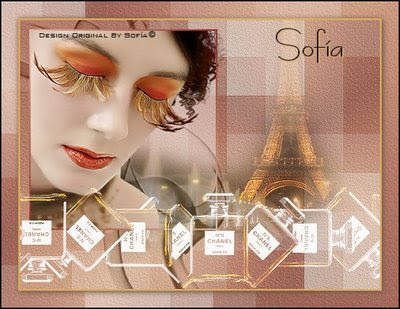
Arrange the girl's tube like you can see in the final example of this tutorial.
Layer / New Layer.
In your Materials' Palette make a gradient with the same colors that the first gradient,
only change: Style: Linear - Angle: 45 - Repeats: 1 - Invert: WITHOUT CHECK.
Rectangule Tool: Line Solid - width: 3.
Draw a rectangle from the top left apex that includes the complete face of the girl.
Layer / New Layer. Selection Tool in Magic Wand and Select inside of the rectangle.

In your Material's Palette put as Foreground: white:
#ffffff
and fill your select rectangle with this color. None Select.
Layer / Arrange/ Move down, repeat twice this step,
until the white rectangle is underneath of the girl's face.
Down the layer opacity white rectangle at 44%.
Open the tube copy PatryMists_06_Cityscape_21
Copy and Paste like a New Layer,
for put this tube take like reference the ray of light that you have from


the initial gradient, use like guide, the final result.
Change Blend Mode to Screen at 100%, name this layer "Torre 1"
Duplicate this layer and change blend mode of this layer at Multiply at 82%, name it "Torre 2"
Arrange both layers underneath of girl's tube, take care that the layers "Torre 1" will be (below)
and "Torre 2" (above).


In your layer "Torre 2" apply this Effects / 3D Effects / Drop Shadow: 2 / 2 / 80 / 15 color: #e3ae5b
Open the copy of tube Marif_2006_juillet_fumee02.
Copy and Paste like New Layer, arrange like you can look in the final result.
Change Blend Mode of this layer at Luminance (Legacy) at 57%
Come back to the Girl layer, duplicate it.

Layer - Arrange / Move up, make sure that is below of your layer with the rectangle.
Open copy of tube PatryTubes_06_Objects_42.
Copy and Paste as New Layer
Image / Resize: Resize at 35%. And put it in the center of your work area.
Effects / MURA´S MEISTER, Copies with the settings that you can look in the capture.
Apply the filter make sure the settings are that I putted and the color is the same: #952418
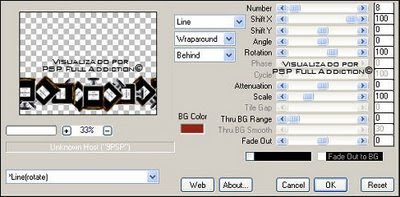


Put the parfums line that made this filter in the bottom part of your tag,
like you can look in the final result.
Change Blend Mode at Screen at 100%.
Effects / FM TOOLS – Blend Emboss apply directly.
Merge visible layers.
Selections - All Select - Modify - Contract selection: 2
Selections - Inverse. Give Delete in your keyboard.
In your Palette's Material: Color Foreground: #e3ae5b (mustard yellow).

If you ask yourself why I didn't add borders directly, let me tell you that when you use the Xero Tekstya Filterconfigurate for make puntille can leave the borders not too much neat,
to avoid this is that we did this last step.

Image / Add borders: 30 Symmetric: Check Color: white: #ffffff

With your Selection Tool - setting in Magic Wand
Select your border
Layer / New Layer
Open your copy of the base. Copy and Paste the selection.
Image - Mirrow
Image - Flip
Without the selection.
Effects / Xero / Porcelain and apply the settings that you can look in the capture.
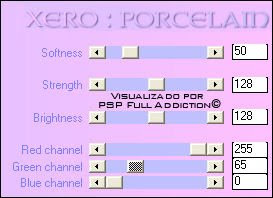


Selections - Inverse
Effects / 3D Effects / Drop Shadow: 2 / 2 / 100 / 15 color: #685241
Selections - All Select - Modify - Contract Selection: 2
Inverse Select. Give delete in your keyboard.
Merge all layers.

This is the moment to resize if you want at size of your choice.
In your Palette's Material put Foreground: #110d0b
Layer - New layer for your text.
In my chase I use Bernhard Fashion, size: 48 color: #110d0b
Effects / 3D Effects / Drop Shadow: 2 / 2 / 75 / 1 color:
#e3ae5b
None Select.

This is the moment to add your watermark if it is your custom to use it.
Merge all (flatten).
Save like Optimized JPG.

We finish! :)


I hope you enjoyed doing this tag!
Any doubt about this tutorial or if you have troubles for download the materials, please
feel free write to me at pspfulladdiction@gmail.com
Also, I would like look your result if you sent it to me.

Big Hugs,
Peace & Kisses
Sofía©

©Copyright Tutorial "Oh La La... París!!" Sofía©
Wrote especially for
PSPFULLADDICTION
24-09-2006
Buenos Aires - Argentina
Translated into English for Sofia©
06-09-2009


Proud Member:



1/23/2009

TUT 14 " NATURAL ESSENCE "


By Sofía©
I created this tutorial in PSP X.


Elements Used:
Tubes, Selections 1, 2 and 3, Font: Stephanie Marie JF


I want to be grateful to Mariel to allow me to use her beautiful tubes in this tutorial, to her the responsibility to make the tubes and the Image's Copyright belong at their authors.


Filters:
SIMPLE, Top Left Mirror - FM TOOLS, Blend Emboss: here
DC LAYER, Mergency 4 here
PIXELLISATION, Patchwork included in Elements

Put the filters in the Complements' folder in your program PSP.
Open the tubes, duplicate it with capital letter + D, then close the original, in the copy eliminate the mark of the tuber and the backgraound if it has. Minimize.
Save Selections in your folder Selections in your PC and then upload in PSP X / Selections/ Load Selection from disc.


Let's go


1. Open a new transparent image, 550 x 412 pixels.In your palette of materials: Foreground (first plane): #ebebc5 and fill your first layer.
Layers / New Layer.In your Palette of Materials: Foreground: #ebebc5 (light green) and Background: #45701f (dark green)
Make a Gradient: Style: Linear - Angle: 140 - Repeats: 1 Invert: Without marking.

Fill your back layer with this gradient. Name this layer "Color Base"
Effects / PIXELLISATION, Patchwork and apply value 105
Effects / SIMPLE Top Left Mirror apply directly (is predetermined filter)
Copy this layer and paste as new image, minimize and save for now, then we will use.

2. Come back your work place. Layers / New Layer, name it: " Fumee 01"
Selection / Select All
Open your copy of tube Marif_2006_juillet_fumee01. Copy and Paste into the Selection. None Selection. Low the opacity of the layer at 75%. Close this layer for now.

3. Layers , New Layer
Selections / Load Selection from Disc and looking for "Sel 02_Natural Essence_By Sofía© Invert Selection: Check.
Open your copy of tube Marif_2006_aout_face055
Copy and Paste into the selection. Without take out the Selection. Layers / New Layer.
Change Gradient using same colors: Change: Angle: 140 - Repeats: 0 (zero). Fill your Selection.
Layers / Arrange / Move Down
Selection / Select None


4. Come back your layer of the girl and apply: Effects - Effects 3D - Drop Shadow: 2 / 2 / 80 / 15 color: #696b16
Load again your Selection, Invert Selection: without check and over the layer of the girl. Give Delete in your keyboard, with this we are giving a neat aspect at the excedent shadow in the face's Girl. Select None.


5. Layers / New Layer
Rectangule Tool: Line style: Solid line - width: 3 and Anti-alias: Check.
Palette of Materials: Close background color and prepare a gradient changing: Style: Radial - Angle: 222 - Repeats: 3 - Invert: without check. Center Point: horizontal/vertical: 50
Draw a rectangule from the top left vortice that cover face's girl, if you think that you doesn't do it perfect, correct it using the nodes of Pick Up Tool or use zoom to test is well done.
Effectos - Effects FM TOOLS, Blend Boss
In your layer "Rectangle" go Layers / Merge Down and merge "Rectangle and Girl's Layer"
Repeat Layers / Merge Down and merge "Girl's Layer with your Background Layer"
Rename this merge as "Frame"
Effects - Effects 3D - Drop Shadows: and apply the shadow used before. Close this layer for now.


6. Layers, New Layer.
In your Material's Palette: Prepare other gradient with same color that we use in the first gradient:
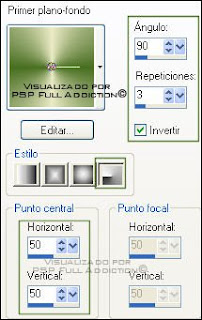
Style: Radial - Angle: 90 - Repeats: 3 - Invert: CHECK. Center Point: horizontal/vertical 50, as you can look in this capture. Fill your layer with this gradient.


7.Layers / New Layer. Selections / Load Selection from Disc and looking for your Selection 01 Natural Essence_By Sofía©,
make sure is checking: INVERT Selection. Give Delete in your keyboard. Selections / None Selection.
Adjust - Sharpness - Sharpen
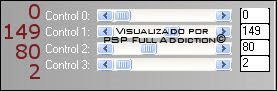
Effects - DC LAYER, Mergency 4, with the follow values that you can look in the capture:


Name this layer: "Base 1"

8. Duplicate this layer. Name it: "Base 2"
In layer "Base 2" apply:
Effects / Effects - FM TOOLS, Blend Emboss

Remember save your work in this point.

9. In your layer " Base 1" apply: Effects - Texture Effects: Blinds: white color, width: 4 - opacity: 45 Horizontal: checking


Selections / Load Selection from Disc and looking again for your Selection "Sel 01_Natural Essence By Sofía©", Invert: without check.
Give Delete in your keyboard in your layer "Base 1". None Selection.

10. Layers / New Layer: Name it: "Pilar 1"
In your Material's Palette prepare the next gradient:
Style: Radial - Angle: 0 - Repeats: 3 Center Point: Horizontal / Vertical: 50 Fill your layer with this gradient.
Selections / Load Selection from Disc and looking for your Selection Sel03_Natural Essence_By Sofía©, Invert: without check.
Give Delete in your keyboard. None Selection.
Adjust / Sharpness / Sharp
Low the opacity of the layer to 55%


11. Duplicate this layer. Name it: "Pilar 2"
Image - Resize: 113% (Resize all layers: WITHOUT check)
Selections / Load Selection from Disc and looking for your Selection Sel02_Natural Essence_By Sofía©, Invert: CHECK.
Give Delete in your keyboard.Without take out your selection go to your layer Pilar 1 and repeat this step. None Selection.


12. Open your layers Fumee 01 and Frame
Merge All (Flaten)


If you want resize your tag this is the moment.


13. Adjust - Digital Camera Noise Removal with this values:


14. Open your copy of layer "Base Color", Copy and Paste as new layer above all your others layers.
Change Blend Mode of the layer to Darken. Low the opacity at 85%.
Selections / Load Selection from Disc and looking for your Selection Sel01_Natural Essence_By Sofía©, Invert: Check
Selections - Modify - Expand: 2 pixels. Give Delete in your keyboard. None Selection.
Selections / Select All
Selections - Modify - Contract: 3 pixels. Selections - Invert - Delete. (Keep the Selection running)

In your Materials' Palette: Foreground: #ebebc5 (light green)
Flood Fill Tool, paint with this color your borde. None Selection.

15. Layer / New Layer for your Text.
Choose a font that you like, I used: Stephanie Marie JF, size: 48. With the same shadow used before, changing only : Blur 5.

16. Add your watermark if it is your custom.
Merge visible layers.
Save as Optimized JPG.


We ended, I hope you enjoyed it.Sofía©


©Copyright Tutorial " Beautiful Arrogantly " By Sofía©
Written especially for PSPFULLADDICTION©
09-23-2006
Buenos Aires - Argentina
Translate by Sofía© 01-23-2009 span>

2/10/2008

TUT 13 " BEAUTIFUL ARROGANTLY "


Beautiful Arrogantly


By Sofía©
I created this tutorial in PSP X.

dClick on image to see real size.


Elements Used:


Tube, Font: Chocolate Box
I want to be grateful to Filly to allow me to use her wonderful tubes in this tutorial

Filters
L & K, Mayra
DBS FLUX, Glass Pyramids


Put the filters in the folder of complements in your program PSP.
Open the tubes, Duplicate with capital letter + D, close the original, on the copy eliminate the mark of the tuber and the background if it has. Minimize.


Let's go

1. Open new image of 550 x 420 píx.
In your palette of materials: Foreground: #f9e8cd (beige) and Background: #7c1a20 it (Bordeaux)
Fill your layer Back with your dark color, Background: #7c1a20 it (Bordeaux)
2. Layers, New Raster Layer
Change the color Background to Foreground and Fill your layer with your dark color.
Effects, To apply Filter L and K, Mayra with these settings:


3. Adjust, Sharpness, Sharpen
4. Layers/Blend Mode: Normal Opacity: 55 %
5. Prepare a gradient as you see in the image: Style: Reflexes - Angle: 0 - Repetitions: 2 - Central Point: Horizontal: 50 - Vertical: 100.


6. Layers, New Raster Layer. Fill your layer with this gradient
7. Effects, Filter: apply DBS Flush - Linear Transmission with the following values:


8. Layer Blend Mode: Normal Opacity: 59 %
9. Effects, Edge Effects: Enhance two times
10. Selections, Selection All. Selections, Modify: Contract: 25. Selections, Invert. Give Delete in your keyboard. Selections, None Selection.
11. Duplicate this layer and Image, Flip.
12. Prepare the gradient of the image in your palette of materials: Radial style, Angle 0, Repetitions 0, Invert: UNCHECK. Central point: Horizontal: Vertical 50: 100, taking care that your light color stay of the left side of your gradient.


13. Layers, New Raster Layer. Fill your layer with this second gradient.
Effects, apply the Filter Tramages: Glass Pyramids: 130.
14. Tools, Selection, Personalized Selection, put these values: top: 0, left: 180, right: 370, bottom 280
15. Edition, Copy (here you can do it of two ways: you keep on developing the tutorial up to the step 20. " Paste in the selection " and newly there you give it, - nothing will happen, it will not get lost - but if you do not feel yourself safe, can paste it as new image and raise again (Copy and Paste) I leave it to your election, according to your experience with the program).
16. Selection, None Selection
17. Close your layer where you applied the filter Tramages Glass Pyramids.

18. Layers, New Raster Layer
19. Tools Selection, Selection Personalized with these values: top: 50, left: 275, right: 500, bottom: 370
20. Paste into the selection, Selections, None Selection
21. Change Blend Mode of the layer to Luminance (Legacy) Opacity: 50 %.
22. You can eliminate your layer where you applied the filter Tramages Glass Pyramids.

23. Layers, New Raster Layer
In your palette of materials, Foreground: your dark color, in this case: #7c1a20, Fill your layer with it
Selections, Selection All. Selections – Modify, Contract: 50
Selections, Invert, Give Delete in your keyboard
Selections, Invert, Selections - Modify - Contract: 2, Give Delete in your keyboard. Selections, None Selection

24. Layers, New Raster Layer
In your palette of materials, Foreground: your light color, in this case: #f9e8cd, Fill your layer with it
Selections, Selection All. Selections – Modify, Contract: 25
Selections, Invert. Give Delete in your keyboard.
Selections, Invert. Select - Modify - Contract: 2, Give Delete in your keyboard.

25. Effects, Effects 3 D – Drop Shadow: 0 / 1/50 / 1 color: #000000 (black)
26. Effects, Effects 3 D – Drop Shadow: 1 / 0/50 / 1 color: #000000 (black). Selections, None Selection
27. Layers, New Raster Layer
In your palette of materials, to continue with your color of Foreground (your light color), in this case: #f9e8cd, Fill your layer with it
Selections, Selection All. Selections – Modify, Contract: 15
Selections, Invert, Give Delete in your keyboard.
Selections, Invert, Select - Modify - Contract: 5, Give Delete in your keyboard.
Apply again the previous shadow done in steps 25. and 26.
Change Blend Mode of the layer: Screen
28. Layers, New Raster Layer
In your palette of materials, change your color of Foreground to your dark color, in this case: #7c1a20, Fill your layer with it
Selections, Selection All. Selections – Modify, Contract: 15, Give Delete in the keyboard.
Change Blend Mode of the layer: Multiply, Opacity 35 %.
Merge All Layers (flatten)

29. Open the copy of the tube Tube_filly (1144) Face, Image, resize: 76 %, Copy and Paste in your area of work as new layer, to accommodate as you can see in image end.
30. Layers, New Raster Layer
In your palette of materials, it continues with your color of Foreground to your dark color, in this case: #7c1a20, Fill your layer with it
Selections, To select everything. Selections – modify - contract: 3, click "delete" in your keyboard.
* This is the moment to resize your work, Image, resize to your taste, in my case I did it to 92 % of the original size.
31. Layers, New Raster Layer for your name
In this case I used of the Foreground the light color: #f9e8cd and Background the dark color: #7c1a20
Tools, Text – Look for font Chocolate Box, width of line: 1, size will depend on your name, in my case I used size 60.
32. Effects, Effects 3D, Drop Shadow:-2 /-1 / 50 / 2 / #000000 (black). Selections, None Selection.
33. Merge All layers (Flatten)


34. Add your watermark if it is your preference.
35. Save as Optimized JPG.


We finish it, I hope you enjoyed it.
Sofía©


©Copyright Tutorial " Beautiful Arrogantly " By Sofía©
Written especially for PSPFULLADDICTION©
06-15-2006
Buenos Aires - Argentina

Translated by Sofía©
02-10-2008

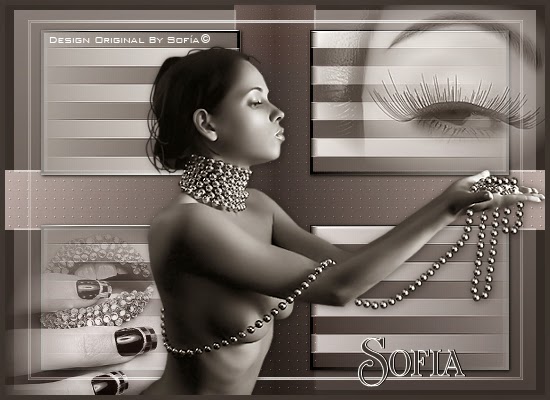
TUT 12 " SILVER OBSESSION "

Silver Obsession

By Sofía©
I created this tutorial in PSP X.


Click on image for to see real size.
Elements Used:

Tubes, mask 20-20, Font: Rubinstein

I want to be grateful to Filly for afford me to use his wonderful tubes in this tutorial.

Filters

L&K, Trouble,
Xero, Tekstya, FM Tools, Blend Emboss and Simple, Half Wrap


Put the filters in the folder of complements in your program PSP.
Put the mask 20-20 in your folder Masks of the Program PSP

Open the tubes, Duplicate with capital letter + D, to close the original, in the copy to eliminate the mark of the tuber and the background if it has. Minimize.


Let's go

1. Open a new transparent image of width: 550 pixels x high: 400 pixels.
2. Layers, New Raster Layer and to fill with your color of Foreground: #dcd6d4, name it Base_1
3. Layers, New Raster Layer and to fill with your color of Background: #332f2f, Change Blend Mode of the layer: Multiply, name it Base_2.
4. Prepare in your palette of materials a gradient as you see in the image: Linear style - angle: 0 - Repetitions: 0 - Invert: UNCHECK


5. Layers, New Raster Layer, name it Trouble_1 and Fill the layer with the first gradient.
6. Effects, to apply Filter L&K Trouble, with these adjustments:


7. Effects, Edge Effects: Enhance
8. Image, Resize: 85 %
9. Effects, To apply Simple Filter – Half Wrap, directly (it is predetermined).
10. Adjust, Sharpness, Sharpen
11. Layers, New Raster Layer, name it Tekstya_1 and to fill with your first gradient.
12. Layers, Arrange, Move down
13. Tool Selection, Magic Wand, to select in layer Trouble_1 the central cross that formed.
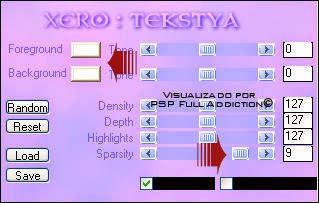
14. Go to your layer Tekstya: Effects, To apply Filter Xero Tekstya, with these values (that only will apply in the selection of the central cross)


15. Without removing selection: Effects, To apply FM Tools, Blend Emboss (it is predetermined)
16. Without removing selection: Duplicate your layer Tekstya two times and to name them Tekstya_2 and Tekstya_3.
17. In your layer Tekstya 3 (that is the one that stayed above of everything), Select, Invert, Delete in your keyboard. Invert Again

18. Without removing the selection, Layers, New Raster Layer, Prepare the following gradient: Style: Linear - Angle: 90 - Repetitions: 1 – Invert: CHECK, name it Gradient_2 and to fill in the chosen area; the inside cross.
19. Selections, Invert.
20. To apply, Effects, Filter FM Tools, Blend Emboss.
21. Selections, None Selection.
22. Change Blend Mode: Overlay

23. Return to your layer Trouble_1, Image, Resize: 85 %.
24. Duplicate this layer and name it Trouble_2
25. In your layer Trouble_2: Selections, Select All, Float
27. Selections, Modify, Contract: 3 pixels, Give Delete in your keyboard
28. Selections, None Selection.
29. Tool Selection, Magic Wand, and to select the external area of the little squares (in the cross that forms)
30. Selections, Invert
31. Effects, Effects 3 D, Drop Shadow: 1 / 1/100 / 5 / color: #000000. Selections, None Selection
32. Tool Selection, Magic Wand, you select again the exterior of your little squares of Trouble_1 and, go to the layer Tekstya_2;
33. Selections, Invert
34. Selections, Modify / Expand: 6 pixels, and you give Delete in your keyboard.

35. You go to your layer Tekstya_3. Selections, Select All. Float.
36. Return to Tekstya_2, to give Delete in your keyboard. Selections, None Selection.
37. Change Blend Mode of the layer Tekstya_2: Screen. Opacity: 44 %.
38. Image, resize: 95 %.
38. Return to your layer Trouble_1: Selections, Select All, Float.
39. Selections, Invert

39. You go to your layer Tekstya_1, and give Delete in your keyboard (you must be sure you that is stopped in your layer Tekstya_1).
40. We are going to control and correct place and blend mode of the layers, till now you would have something like this:
Trouble_2: Normal: 100 %
Gradient_2: Overlay: 100%
Trouble_1: Luminance (Legacy): 60%
Tekstya_3: Screen: 55 %
Tekstya_2: Screen: 44 %
Tekstya_1: Normal: 100%
Base_1: Normal: 100%

41. Merge all (flatten).
42. We open the copy of the Tube_Filly (279)
43. Layers, Load/Save Mask, Load Mask from disc, look for the mask 20-20 and apply it, make sure that Invert Transparence: UNCHECK. Merge Group.

44. Image, Mirror
45. Image, Resize: 65 % and Copy and Paste as new layer, put like you can see in image end (make sure that the hand of the model comes up to your low left corner, good near to it and that the top part of the tube does not exceed the square).
46. Change Blend Mode of the layer to Luminance (Legacy) Opacity: 85 %
47. Open the copy of the Tube_ Filly (278)
Tool Selection, Personalized Selection and to apply the following values: to see image.


48. Copy and Paste it as new image, rejects the previous one.
Layers, Load/ Save Mask, Load Mask from of disc and to apply the mask 20-20. Merge group.
Image, Resize: 90 % Copy and Paste as new layer, Put like you can see in image end, with the same care as in the previous tube without leaving that it exceeds the square, in this case of the left and lower side.
Change Blend Mode: Luminance, Opacity: 85 %
49. Layers, New Raster Layer, Fill with your second gradient, but this time: Invert: UNCHECK, name it Square_1.
50. Image, Resize: 90 %. Selections, Selection All, Float. Selections, Modify, Contract: 3 pixels. Delete in your keyboard, Selections, None Selection.
Change Blend Mode: Screen, Opacity: 75 %.
Effects, Edge Effects, Enhance

51. Open the copy of the Tube_ Filly (204), Image, Resize: 90 %
Image, mirror,
Copy and Paste as new layer in your area of work.
Effects, Effects 3 D, Drop Shadow: 1 / 1 / 50 / 12 color: #000000 (black)
52. Layers, New Raster Layer, name it: Square_2, Fill with your dark color: #332f2f
Selections, Select All. Selection, Modify, Contract: 5 pixels. Give Delete in your keyboard, Selections, None Selection
Merge all the layers (Flatten)
53. Layers, New Raster Layer for your name. In palette of materials: Foreground: #ffffff (white) and Background: #000000 (black)
Tools, Text, Font Rubinstein size in my case: 55, width of line: 1.
Effects, Effects 3 D, Drop Shadow: 0 / 1 / 100 / 0 color: black.
Selections, None Selection.
Merge all (Flatten).


54. Add your watermark if it is your custom.
59. Save as Optimized JPG.


We ended, I hope you enjoyed it.
Sofía©


©Copyright Tutorial " Silver Obsession " By Sofía©
Written especially for PSPFULLADDICTION©06-12-2006
Buenos Aires - Argentina

Translate by Sofía©
02-10-2008

TUT 11 " LOVE ORACLE "

Love Oracle

By Sofía©
I created this tutorial in PSP X.

Click on image for to see real size.


Elements:


Tubes, Font: Anglo Saxon &
Font Evanescent

I want to be grateful to
Kat of NKdesigns for afford me to use her beautiful tubes in this tutorial, (except of " zodiacs signs” that I do not know author of the image and tuber).
© Artist of Corfe Castle: J. Walls ©


Filters:

Redfield, Craquelure 3 D
FM Tools, Blend Emboss
Open the tubes, Duplicate with capital letter + D, to close the original, in the copy to eliminate the mark of the tuber and the background if it has. Minimize.


Let's go


1. Open a new transparent image of 500 of width x 600 of high.
2. In your palette of materials Foreground: #45354d (dark violet) and Background: #ffffff (white)
3. Fill your layer of fund with this color (dark violet), name it: Base
4. Layers, New Raster Layer, name it: Back_1
5. Prepare a gradient, but this time you will do it personalized:
Style: Reflexes, Repetitions: 1 horizontal, Central Point: 50 and Vertical: 73, Connect central and focal points: check


Now you open where says: Edit
You try to copy this gradient that you can see in the image, as you observe that I have lowered almost the whole white color, how? moving the little rhombs of above of the bar, copy like you see it: where 1 says: you put in position 0 (zero) your white and like this color with other points: 2 in position 57 and 3 in position 100 (dark violet), once modified this you is going to appear a message saying that your first plane has changed, give to accept.


Fill your layer with this gradient. Blend Mode of the layer: Multiply, Lower the opacity: 53 %.
6. Duplicate the layer two times, you will have Back_2 and Back_3, to put both layers Blend Mode: Normal: 100 %, but for now close the layer: Back_3, we will use her, then.
7. In your layer Back_2: Effects, to apply Filter: Craquelure 3 D / Toilet Ripples: with these adjustments:

8. Tool Selection, Freehand, feather: 55, Select like you can see in the image, (Note: the selection has a curvature in the top part, it is not straight) that was realized before you can see the dotted line:


9. Give Delete in your keyboard 2 times. Selections, None Selection.
You move this result down a bit, like you can see in the image end.
10. Open your layer Back_3 (it has to be above of all others)
11. Effects, to apply the filter Craquelure 3 D / Silicium with these values, here the only thing that I changed was the angle of inclination that you have it below as you see in the image, the rest keep equal.


12. Change Blend Mode of the layer: Dissolve, to lower the opacity: 18 % Close this layer for now.
13. Open the copy of the tube KAT_misted_asking the Star, Copy and Paste as new layer, name it: Kat_1
14. Image, Resize: 85 %, put like you can see in the image end.
Change Blend Mode of the layer: Kat_1: Screen: 100 %

15. Duplicate the layer, name it Kat_2, Blend Mode in Normal, to lower the opacity: 80 %
16. Open the copy of the tube KAT_misted_JWalls_CorfeCastlesmall, Copy and Paste as new layer.
Image, Resize: 85 % two (2) times, put like you can see in the image end.
Change Blend Mode of the layer: Luminance (Legacy), Opacity: 65 %.

17. Open the copy of the tube Zodiac_signs, Copy and Paste as new layer, name it Zodiac_1
Image, Resize: 75 %
Image, free Rotation: Turn Right: check, angle: 5 grades.
Effects, to apply filter FM Tools, Blend Emboss (it is predetermined)
Effects, Effects 3 D, Drop Shadow: 10 / 10 / 100 / 10 color: #2f2037, to apply twice this shade.
To accommodate to the height of the knees.

18. Duplicate the layer, name it Zodiac_2. Close
19. Change Blend Mode of the layer Zodiac_1: Overlay – To lower the opacity to 44 %
20. Open your layer Zodiac_2, Change Blend Mode the layer to Luminance (Legacy) – Opacity: 85 %
21. With the tool Selection: Freehand: Feather 0, Smoothing: 0 Smooth: check
Draw an outline around the inside ellipse of the tube, to see image:


Once the dotted line or small ants begin to move, Convert the selection to layer, this you do in layers or directly in your palette of layers stopped on the layer and with the button right to meet To turn Selection into layer.
Change Blend Mode of the layer: Normal.
Selections / None Selection
22. Adjust, Adjust Hue and Coloration, Colorize: Tone: 193 / Saturation: 105
Lower the opacity of the layer: 38 %.
23. Return to your layer Zodiac_2
Adjust, Blur, Motion Blur: angle: 225 / Forces: 100
24. Open your layer Back_3.
25. Image, Add Borders: 1 pix. symmetrical – color: #221f25
Image, Add Borders: 3 pix. symmetrical – color: #f9f6fc
Image, Add Borders: 1 pix. symmetrical. – color: #221f25

26. Layers, New Raster Layer for your text Love Oracle,
In your palette of materials: Foreground: closed Background: #ffffff
Tool, Text, Font: AngloSaxon, size: 36, Direction: vertical and left, width of the line: 0, Loading: - 129, you write your text.
Changes Blend Mode of the layer to Luminance (Legacy) Opacity: 86 %
27. Layers, New Raster Layer for your name: You choose the colors that you prefer, I used Foreground: #ffffff and Background: #cd94b2
Tool, text, Font: Evanescent, size: 60, Direction: horizontal and below, width of the line: 1, Loading: 0, you write your name.
Effects, Effects 3 D, Drop Shadow: 2 / 0/100 / 5 / color: #d1b0cf
28. Merge All (flatten).
Optional:
Image, Resize: 86 % or to the size that you prefer.


28. Add your watermark if it is your custom.
29. Save as Optimized JPG.


We ended, I hope you enjoyed it.
Sofía©


©Copyright Tutorial " Love Oracle " By Sofía©
Written especially for PSPFULLADDICTION©
06-09-2006
Buenos Aires - Argentina

Translate by Sofía©
02-10-2008

TUT 10 " TAG CHERISH "

Tag Cherish

By Sofía©
I created this tutorial in PSP X.


Click on image for to see real size.

Elements Used:


Tubes, mask 20-20, Font: Palms International


I want to be grateful to
Patry for afford me to use her beautiful tubes in this tutorial.
Filters:

Filtres Unlimited 2.0
Xero – Tekstya, (in Xero 3)


Put the masks in your folder Masks of the Program PSP
Open the tubes, Duplicate with capital letter + D, to close the original, in the copy to eliminate the mark of the tuber and the background if it has. Minimize.


Let's go


1. Open a new transparent image of 550 x 400 pixels.
2. In your palette of materials: Foreground (first plane) #d1c4a1 (beige) and Background: #77663f
3. Fill your layer of back with this color (beige).
4. Layers, New Raster Layer.
5. In your palette of materials invert the order of the colors and fill the layer with #77663f
6. Effects, apply Filters Unlimited 2.0 – Textures Paper - Papyrus: with these settings: Intensity: 66 – Lightness: 96
7. In your palette of layers: Blend Mode: Hard Light
8. Lower the opacity of the layer: 45 %.
9. Layers, New Raster Layer
10. Fill this layer again with #d1c4a1 (beige)
11. Effects, apply the filter Xero – Tekstya with these setting (You has in mind where I did rectangles, to see in the image)

12. Image, Resize: 250 %, only this layer.
13. In your palette of layers, to lower the opacity to 63 %.
14. Layers, New Raster Layer you fill with your beige #d1c4a1 again
15. Effects, apply Filter Unlimited 2.0 – Edges Squares - Edges Square Nº 17.
16. Image, Resize: 85 %.
17. In your palette of layers, to change Blend Mode: Darken
18. In your palette of materials change Foreground: #77663f

19. Layers, New Raster Layer
20. Tools, Brush, settings: like you can in the image, to apply once in the top left angle and again in the low right angle.


21. Lower the opacity of your layer brush to 55 %.
22. Open the copy of the tube Zigzag and Copy and Paste as new layer, put to the left
23. Duplicate the Zigzag, Image - mirror
24. Open the copy of the tube PatryTubes_06_Victorian_05, Copy and to Paste as new layer in your area of work.
25. Put it in the top part, where you can see a third of the tube approximately.


26. With your tool Selection, (the little arrow) to stretch towards the sides up to doing it come on both sides.
27. Change Blend Mode of the layer to: Soft Light.
28. Duplicate the layer, Image – Mirror and Image – Flip, name it this layer “Save_2”
29. Duplicate the layer "Save_2", name it " Save_3" and to close for now.
30. Open the copy of the tube PatryMists_06_Beauty_114, Copy and Paste as new layer.
31. Open your layer " Save_3 ", Layers, Arrange, Move Up and it will stay for on the layer of the girl.

32. Layers, New Raster Layer.
33. In your palette of materials, Foreground (first plane): #77663f – Background: #d1c4a1
34. Prepare a gradient over your color of background: Style: linear – Angle: 140 – Repetitions: 1 – Invert: check. Note: You must has your foreground color: #77663f (your dark color)
35. Tools, Rectangle, to realize a rectangle of 310 x 30 of high place approximately and you begin to do it in the half of your area of work.
36. Tools, Mesh Warp – Mesh Warp and to realize the following sequence:
37. The node named 1, to move down a bit until the curve stays how you can see in the image:


38. The node named 2, to move up in the same proportion as the previous one.


Note: This distortion is very subtle, it is only to give something of movement to our ribbon.
39. Image, free rotation: angle: 145 to the left, to accommodate the ribbon on the right top apex, up to concealing the ends of our bond.
Note: there will appear a little message who says Automatic Actions: Accept.
40. Lower the opacity of your ribbon to 70 %.
41. Effects, Effects 3 D, Drop Shadow: 3 / 3 / 50 / 8 color: #837253
42. Open the copy of the tube Heart and Copy and Paste as new layer, to accommodate on your ribbon.
43. Image, free rotation: angle: 10 to the left.
44. With your tool selection (Freehand), setting: point to point, to select the part of the hoop that hold it, would stay behind, to give Delete in your keyboard, to see in the image:


45. Adjust, Sharpness: Sharpen.
46. Effects, Effects 3 D, Drop Shadow: 3 / 3 / 50 / 8 color: #837253
47. Open the copy of the tube " key " Copy and Paste as new layer, and to accommodate as you can see in the image.

48. Adjust, Sharpness: Sharpen.
49. Effects, Effects 3 D, Drop Shadow: 3 / 3 / 50 / 8 color: #837253
50. In your palette of material: Foreground: #000000 – Background: #c0c0c0
51. Prepare a gradient: Style: linear – Angle: 140 – Repetitions 1 – Invert: check.
52. Layers – New Raster Layer.
53. Tools, Pen: with following settings.
54. In style of line: open it and to go personalize and you put the values that you can see in the image, where says size in each one you put: 3, then save and give it a name to your line of little dots or little balls.


55. You draw a line since the hoop of the heart up to the beginning of your key. Convert your layer of vector into raster layer.
56. Effects, Effects 3 D, Drop Shadow: 3 / 3 / 50 / 8 color: #837253
57. Open the copy of the tube Cherish and Copy and Paste as new layer.
58. Lower the opacity of the layer to 65, to accommodate as you can see in the image end.
59. Merge all (Flatten)

60. Layers, Promote Background Layer to your merger.
61. Layers, New Raster Layer, Fill with white color
62. Layers, Load/Save Mask, Load Mask from disc: to look for your mask 1058: Luminosity of origin, adjust to linen, to conceal all the masks and to invert transparence and to apply: all check.
63. Merge group.

64. In your palette of materials: Foreground: closed – Background: #a29472
65. Layers, New Raster Layer for your text, to choose a font that you like, I used it is Candia Script SSK, size 72, you write your name.
66. Effects, Effects 3D, Drop Shadow: 2/2/80 / 3 color #cfc19
67. Selections, None Selection.

68. Add your watermark if it is your custom.
56. Merge all flatten
57. Save as Optimized JPG.


We ended, I hope you enjoyed it.
Sofía©

©Copyright Tutorial " Tag Cherish " By Sofía©
Written especially for PSPFULLADDICTION©
05-27-2006
Buenos Aires - Argentina

Translate by Sofía©
02-10-2008

2/09/2008

TUT 9 "TAG SENSUALITY IN BLUE"


Click on image for to see real size.

By Sofía©
I created this tutorial in PSP X.

I want to be grateful to Monique and to Exclusively Rita for allow me
to use her magnificent tubes in this tutorial.


Elements Used:


Tubes, mask 20-20, Font: Palms International


Filters:

PIXELLISATION – Diamond Glass,
DSB Flux – Mosaic Ripple and FM Tools - Blend Emboss


Put the filters in the folder of complements in your program PSP.
You remember to keep your program closed while you download the filters.
Put the masks in your Masks folder of the Program PSP Open the tubes,
Duplicate with capital letter + D, to close the original, in the copy to eliminate the mark
of the tuber and the background if it has. Minimize.
Let's go

1. Open a new transparent image of 500 x 350 pixels
2. In your palette of materials: Foreground #37689d
3. Fill your layer of back with this color
4. Layers - New Raster Layer, name it Base_1
5. In your palette of materials change the Foreground: #b1c9db and Background: #37689d
6. Prepare a gradient with these settings: Linear style, angle: 90, Repetitions: 4, Invert: check
7. Fill your layer Base_1 with this gradient
8. Effects, apply the filter L&K Raisa with these settings: Control 0: 92 - Control 1: 0.

9. Layers - New Raster Layer, name it Base_2
10. Modify the gradient that you had with these adjustments:
Foreground (first plane): #88acc6 (baby blue) and Background: #37689d Style: Radial, angle: 90, Repetitions: 5, Invert: uncheck
11. Fill your layer “Base_2” with this new gradient

12. Adjust, Blur, Gaussian Blur: 15
13. Effects, apply the filter DSB Flush, Mosaic Ripple, with these adjustments: where Mosaic says: you put 30, and in Pull: 202, to accept.
14. Effects, Edge Effects, Enhance
15. Effects, apply the filter Pixellisation, Diamond Glass, with these settings (to see image)


16. Effects, FM Tools, Blend Emboss, you apply it (it is predetermined).
17. Open the copy of the tube " rw-Kate_Hudson 1 ".
18. Layers, Load mask from disc with these values, make sure that it is not check to invert the mask.
19. Layers, Merge group
20. Image, Resize: 65 % All the layers: check.
21. Copy and Paste new image in your area of work, name it Girl_1
22. Duplicate the layer, name it Girl_2
23. Layer Girl_1, Blend Mode: Screen

24. Layer Girl_2, Blend Mode: to lower the opacity to 65 %
25. On Layer Girl_2, to apply the following shade:
26. Effects, Effects 3D, Drop Shadow: 3 / 3/80/18 / color: #2a435e, two times
27. Open the copy of the tube Tubed by Monique42_1524
28. Image, Resize: 75 %

29. Copy and Paste as new layer in your area of work, to accommodate to your left
30. Put in the layer Base_ 2,
31. Tools, Selection, Rectangle with feather 50, that you will draw on the rose without covering it completely, you can see in the image:

32. In your keyboard to give Delete two times.
33. Close the layers of the girl and of the flower, Merge visible layers, Duplicate with capital letter + D and to reserve the copy of this back that you have, to minimize for now.
34. You return to your area of work, to give Undo last action (or the merger that you made), to open the layers that you closed first, those of the girl and that of the rose.

35. Merge all the layers

36. Add Borders: 1 pix, symmetrically, color: #2d6c8f
37. Add Borders: 2 pix, symmetrically, color: #87abc5
38. Add Borders: 1 pix, symmetrically, color: #2d6c8f

39. Add Borders: 25 pix, symmetrically, white color

40. With your tool Magic wand, feather: 0 (zero) to select the last realized border.
41. Layers, New Raster Layer

42. Open your minimized back, Copy and Paste in the selection of your area of work
43. Image, mirror
44. Selections, Invert
45. Effects, Effects 3 D, Drop Shadow, with the same values Step 26.
46. Selections, None Selection.

47. Add Borders: 1 pix, symmetrically, color: #2d6c8f
48. Selections, None Selection

49. Layers, New Raster Layer for your text
50. Tools Text, to use font of your election or the one that I used in this occasion, Palms Internacional, windth of line: 0, size 48.
51. In your palette of materials, the Foreground (first plane): Closed, Background: White.
52. You write your name.
53. Effects, Effects 3 D Drop Shadow: 3 / 3/80 / 8 / color: #2a435e
54. Selections, None Selection.


55. Add your watermark if it is your custom.
56. Merge all flatten
57. Save as Optimized JPG.


We ended, I hope you enjoyed it.


Sofía©


©Copyright Tutorial " Tag Sensuality in Blue " By Sofía©
Written especially for PSPFULLADDICTION©
05-18-2006
Buenos Aires - Argentina


Translate by Sofía©
02-09-2008

TUT 8 "BLEND VAUDEVILLE"


Click on image for to see real size.
By Sofía©
I created this tutorial in PSP X.
I want to be grateful to Gini, Monique and to Exclusively Rita for
allow me to use their magnificent tubes in this tutorial.


Elements Used:


Tubes, mask 20-20, mask 89, Fonts: Greyhound and Constanza


Filters:

Photo Aging Kit

Important Note: the filter Photo Aging Kit works under the environment of Filters Unlimited 2.0. that's why when downloaded and decompressed; open your PSP, look for Filter Unlimited 2.0. go bottom everything where says: "Import" and to look for the folder of Photo Aging Kit in the directory where you have kept it and to Import, now it will be able to use it.
You remember to keep your program closed while you download the filters.
Put the filters in the Complements' folder in your program PSP.Open the tubes,
duplicate it with Shift + D, then close the original,
in the copy eliminate the mark of the tuber and the background if it has. Minimize it.

Let's go

1. Open a new transparent image of 550 x 400 pixels.
2. In your palette of materials: Foreground: #b67479 and Background: #642e35
3. Prepare a gradient: Style: Radial – Angle: 180 – Repeat: 3 – Invert: check –
Central Point: Horizontal: 73 – Vertical 0, look next capture.


4. Fill your layer of background with this color (gradient)
5. Effects, Filters Unlimited 2.0 / Photo Aging Kit / Center Spot/Vignetting: value 192.
6. Open the copy of the tube "Caro_mist128", (the keyboard of piano).
7. Copy and to paste in your work area
8. Image, resize to 70 % and arrange it center in the bottombelow, look in final result,
9. Stretch it only a little bit of their sides with: Selection Tools,
Selection and stretching from the sides.
10. Decrease opacity of the layer: 44%.
11. Open the copy of the image AMC107.
12. Layers, Promote Background Layer
13. Layers, Load mask from the disc: look for the mask 89 and apply.
14. Layers, Merge group
15. Copy and Paste as new image in your work area
16. Arrange in the center above the keys of the piano.
17. Decrease the opacity of this layer: 75 %.
18. Open the copy of the tube "BeautifulFace_MistedByGini_04-17-06".
19. Copy and Paste in your work area, Image, Resize to 80 %,
arrange this tube at right side, look in the final result.
20. Effects, 3 D Effects, Drop Shadow: 3 / 3 / 100 / 18 / color: #642e35
21. Tools, Eraser, configured like in the next capture; erase the small part of model's shoulder.

22. In your palette of layers, decrease opacity of the layer of the girl to 85%.
23. Open the copy of the tube "rw-sexyleg",
24. Layers, Load mask from disc, to look for your mask 20-20 and apply.
25. Merge group. Image, Resize to 95 %
26. Arrange the tube to your left side.
27. Decrease the opacity of the layer to 75%.
28. Now a final detail: after as your tube rw-sexyleg was arrange,
we are going to erase in the layer of the keys of the piano,
only a little bit, carefully so the result will look better,
now setting your Eraser Tool eraser as step 21., only this time,
you will decrease the opacity of eraser to: 5,
change size of the eraser and increase it to 20: and erase,
make this eraser with a circle shape at left part of the keys,
like you can look in this image.

29. Do the same work of eraser follow in the layer of the keys of the piano above the face of the model, where you have had a small dark shadow, erase it.
The sense of this step is give an excellent view to our design. Let's continue.
30. Layers, New Raster Layer, Fill this layer again with your gradient, name it "Linen 1"
31. Effects, Texture Effects:, Texture: Coarse linen, with this settings.

32. Duplicate this layer, name it "Linen 2"
33. In layer "Linen 1", change Blend Mode: Screen and decrease opacity: 49%
34. In layer "Linen 2", change Blend Mode: Overlay and decrease opacity: 60%
35. In the layer "Linen 2", apply Effects, Edge Effects: Enhance.
36. Merge all layers.
37. Image, Add borders, 1 píx, symmetrically, color: black

38. Layers, New Raster Layer for the text " Vaudeville "
39. In your palette of materials: Foreground: #642e35 background: #eecaac
40. Text Tool, look for font Greyhound, size 72, width of line: 1, and write the text: Vaudeville
41. Effects, 3 D Effects, Drop Shadow: 2 / 2/80 / 8 / color: #b67479
42. Image, Free Rotate, Direction: Left Rotation 90 degrees
and to put your text in the center of left side.
43. Change Blend Mode of the layer: Overlay.
44. Layers, New Raster Layer for your name
45. In your palette of materials: Foreground (first plane): #b74d45 Background: #eecaac
46. Text Tool, to look for font Constanza size 72, width of line: 1, and write your name
47. Effects, 3 D Effects / Drop Shadow: 1 / 1 / 50 / 1 / color: #b67479
48. Selections, None Selection.

49. Add your watermark if it is your custom.
50. Save as Optimized JPG.


We finish, I hope you enjoyed it.

Sofía©

©Copyright Tutorial " Blend Vaudeville " By Sofía©Written especially for PSPFULLADDICTION©05-18-2006
Buenos Aires - Argentina
Translate by Sofía©
02-09-2008